
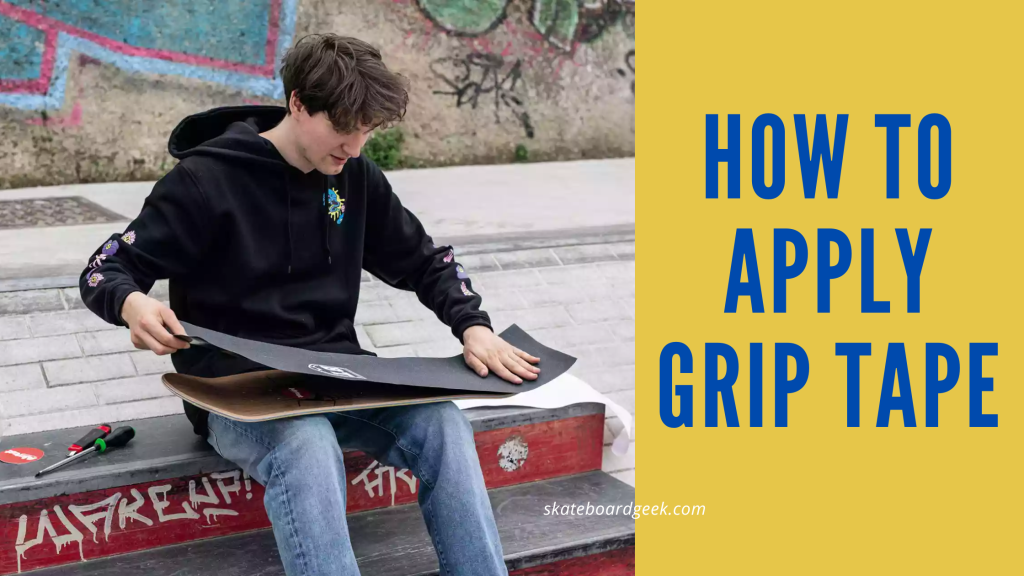
Grip tape helps to keep your feet in place while skateboarding and prevents them from slipping off the deck. It is a must-have safety feature of a skateboard that every skater should have regardless of their skill level. If you have never applied it before and want to learn the best DIY method to apply grip tape on your skateboard, this guide will make this tricky process simple for you!
Contents
How to Apply Grip Tape?
Applying grip tape on a skateboard is not challenging and it does not require any professional assistance, you can do it yourself at home. All it takes is a few tools and practice.
Note: This method is for applying grip tape on a new or plain deck without any adhesive. If your skateboard already has grip tape (which is dirty or worn out), it is essential to remove it and clear the deck to apply the new tape. Here’s a detailed guide on removing grip tape.
Things Required
- Grip Tape
- Cutter
- Screw Driver
- Hair Dryer (Optional)
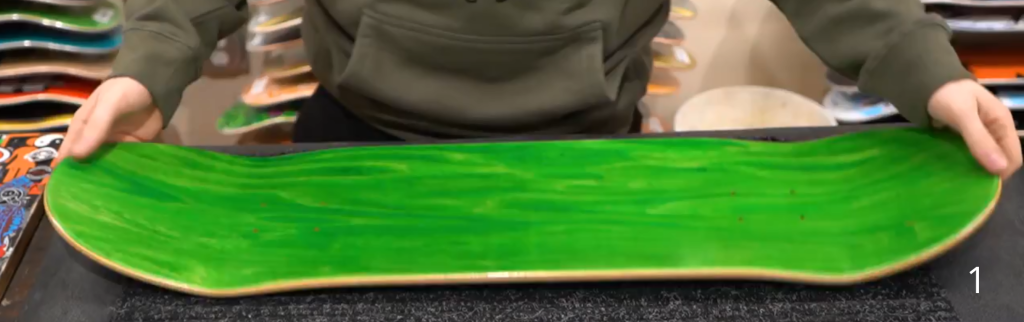
Step 1: Prepare the Deck
The first step is to clean the deck of your skateboard or longboard. Use a cloth to remove any dirt, grime, or debris. If there are any bumps on the surface, use sandpaper to level them out.
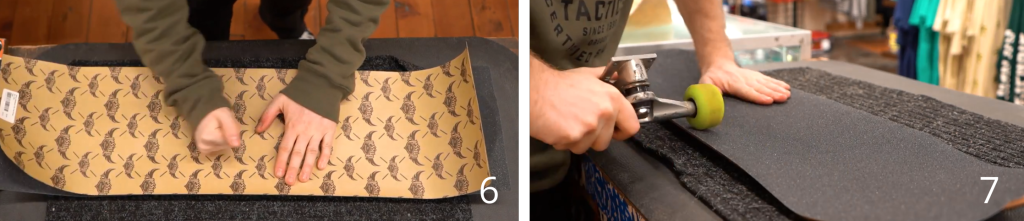
Step 2: Line Up and Press Down the Grip Tape
Next, start by peeling the bottom sheet off the grip tape and line it up on the deck. Make sure that the edges are even and there is no overhang. The grip tape should be longer and wider than the deck, you can cut the excess tape later.
Also, keep in mind to place the grip tape centered on the deck and not extending towards any side.
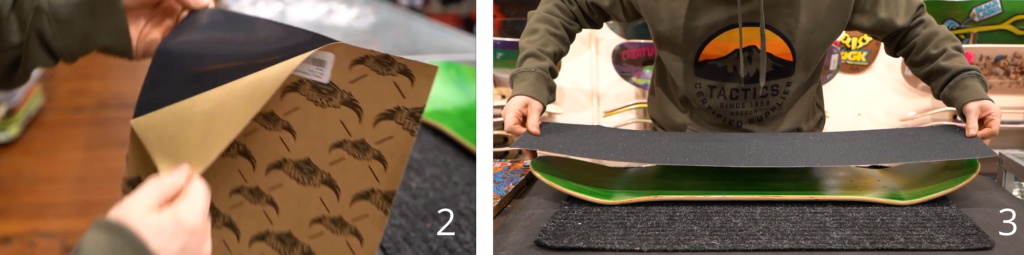
Place the grip tape on the deck evenly, and make sure the sticky side of the tape is at the bottom. Gently apply pressure and slide it out with both hands from the center of the deck towards both ends – nose and tail.
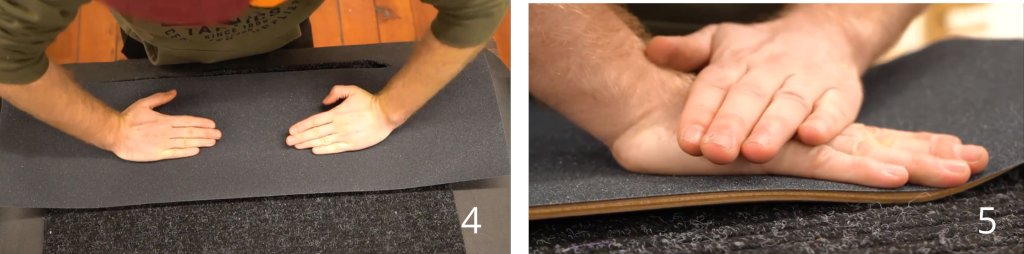
Step 3: Remove Bubbles and Smooth Out
Once you have applied the grip tape, use your fingers to apply pressure and smooth out any bubbles. If there are areas where the tape is not sticking, apply more pressure or use a hairdryer to heat up the adhesive and make it sticky again.
Step 4: Trim the Excess Tape
Now that the grip tape is applied, it’s time to cut the extra tape around the deck. To mark the surface for cutting, grind on the outline of the deck from the top of the grip tape. This grinding will draw a visible white line indicating the board’s edges.
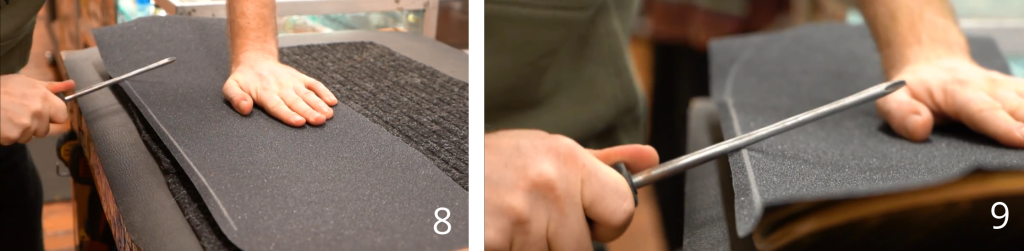
Take a sharp cutter and carefully trim the excess tape from the edges following the white line. Be careful not to cut into the deck while doing so. Once all the excessive tape has been removed, again rub the edge of the grip tape with pressure to round down and make it even.

Step 5: Apply Heat and Pressure (Optional Final Touch)
After trimming the excess tape, apply a little heat and pressure on the entire surface of the grip tape to make sure it is stuck properly. Do not apply too much heat, a few seconds would be enough just to even down the adhesive and let it strongly attach to the surface of the deck.
Note: Keep the hair dryer at least 6 inches away from the grip tape and move it around in a circular motion.
Finally, make holes for the truck‘s hardware with the help of a screwdriver or simply push the Philips hardware.

Complete Video Tutorial on Applying Grip Tape on Skateboard
Final Words
Applying grip tape is not difficult, and it does not require any professional assistance. All you need are a few tools and some practice. With the above-mentioned step-by-step guide, you can easily apply grip tape on your skateboard or longboard at home.
Just make sure to clean the deck thoroughly before applying the grip tape, line it up evenly, press against the deck, and trim the excess tape from the edges. You can also apply a little heat and pressure to make sure the grip tape is firmly attached to the deck.
Frequently Asked Questions
How do you apply grip tape perfectly?
To apply grip tape on a skateboard deck, first wipe and clear the deck from any dirt. Peel off the bottom sheet from the grip tape and line it up with the deck. After that, place it and apply pressure to spread the tape evenly on the deck. You can also press with your fingers and palm to press down the tape where you see the bubbles. Finally, grind the edges of the board with a screwdriver to make a cutting mark, and remove the extra tape using a cutter or blade.
Can you put Griptape over griptape?
No, you cannot put griptape over griptape. The upper side of a gripe tape is rough and the adhesive will not stick over a rough surface for long. It is advised to remove the grip tape, clear all the adhesive and then apply new tape on the deck.
What tools do you need to put on grip tape?
You will need the following tools to put on grip tape;
- Grip Tape
- Cutter or Blade
- Screwdriver
- Clean Clothe
- Best Electric Skateboard for Big Guys (Heavy Duty E-Boards) - June 3, 2023
- Skateboard Clothing Brands to Make You Stand Out In 2026 - May 31, 2023
- 90s Skateboarding Brands: The Rise and Fall of the Legends - May 28, 2023